
I have been learning PHP as my third programming language for a little while now. I started with the generic book studying and followed up with writing my own programs. As anyone who’s learnt or read about coding in PHP will know, everyone always ends up beginning with SQL and databases. I did the same. I created the database, accessed it and opened a connection. This is where I then moved on to the sign up and login system. In this article I will run through how I programmed the login portal and the methods I used to overcome the problems I had.
Database
This login portal is actually rather simple. Only needing one table for the users that sign up. The PHP code will access this table when a user signs up to insert their data and also to read the information and display it when someone logs in.Note: You should know that I named my database ‘php_login’. It’s not essential that you use this name but you should think about using a memorable name for your database connection.
I have used phpMyAdmin as the database program whilst building this. On the image below you will see the structure of my table. If you haven’t seen this layout before, it’s very easy to understand. The bold on the left is the name of column, the golden key means that field is the primary key. The grey keys are other fields that could be used as a primary key as they always need to be unique.
The Type is the next section. It’s quite easy to understand what to use for each one. Fields with just numbers will be ‘int()’, anything like a username or email that can contain letters or numbers will be ‘varchar()’. There are others such as ‘char()’ and ‘datetime’ that can be used but these are the only ones needed for the login system. The numbers inside the brackets represent the amount of characters that can be used in each field. The collation is a bit of a complication option and I will explain later why choosing ‘utf8_general_ci’ early on is a good idea.
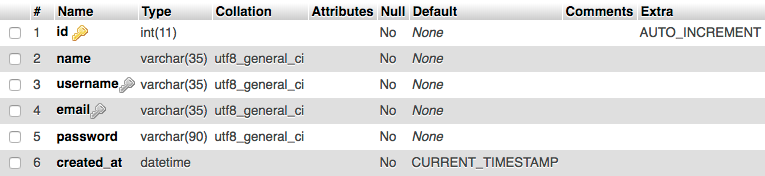 Within this table I used six columns, though you can use more or less, depending on how much information you want from your users. I opted to go with a pretty simple form, so people can sign up fast while I still get everything I need to provide a good site experience.
 The first column I included was an ID. For nearly every database table you will create, it’s likely that you’ll need to include an ID column. This will always start at zero, there will never be a duplicate number and every record will increase the id number by one. Another good reason to have an ID column is to assign it as the primary key. A primary key is a unique field that will identify every single record in a database table. The ID isn’t always used as the primary key as there are other fields that always have to be unique such as a username, account number or product code.
I have only used the ID as the primary key field in this table as it is just the simplest column and best to identify.
The name, username and email fields are all relatively similar in that they are all varchar’s and I have decided to allow 35 characters in each field. 35 may be a little high but I thought it would be easier having the fields allow a few extra characters than having someone call me up saying their email address won’t work. Apart from the Collation option that I have said I will talk about later, this is all I have changed for these fields.
Next is the password. Obviously I used varchar again here because almost everyone tries to get a couple of numbers and symbols in their passwords. The 90 character limit is the result of a two day long fight I had with my PHP program. I will talk more about this later but to put it simply, the program uses the password_hash() function for encryption and this results in a string of at most 72 characters long. 90 is used just as a precaution.
The created_at field is another that isn’t essential but can be very useful. It records the immediate time and date that the user signed up.
The Pages
For the most basic php login and sign up form you will need five pages. I have used six since I added a logout function upon completing the project. You’ll need to start with a database connection file.db_connect.php
I named my database connection file ‘db_connect.php’. This file isn’t essential, since you could just include the few lines of PHP code you need for the connection at the top of every connection page. At the start of this file you need to declare some variables. These variables are used for information about the database. You can see on the code below that we start with the servername.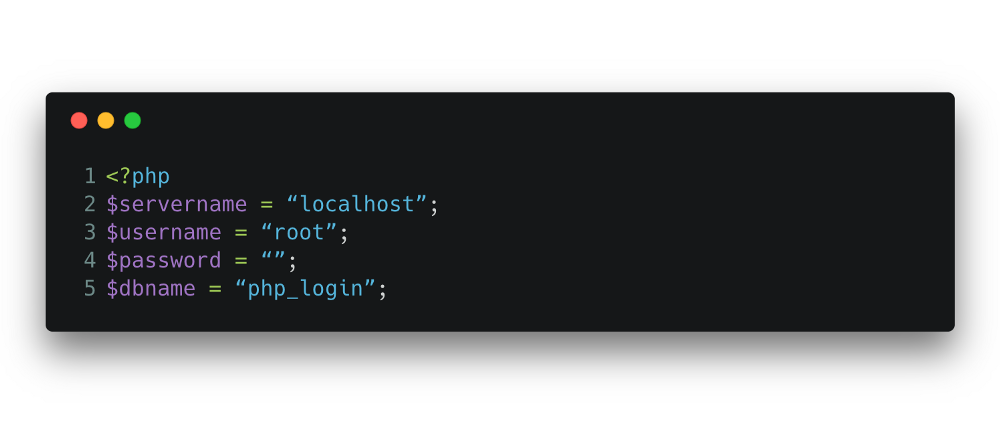 If you try to use the login details that I have used below you will probably be successful as I believe that these details are standard for everyone. If you want to see other accounts on your ‘phpMyAdmin’ then go to the ‘User Accounts’ tab at the top of the screen. As you can see from the image below, I have several default accounts on my system, I have used the bottom one for this project. The servername is ‘localhost’, there is no password, the username is simply ‘root’ and the dbname (another way of saying ‘database name’) is the same as what you named your starting database at the start of this project. I used php_login for obvious reasons.
 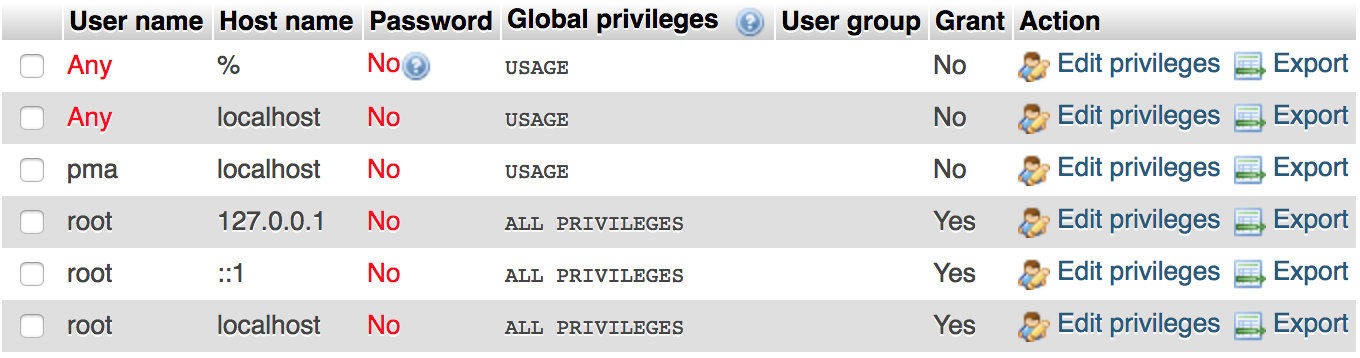 The next job is to create the connection. Now I think there are a few various ways this is possible but the way i’ve done it is a very simple way. I have included the code below for you to take a look at.
 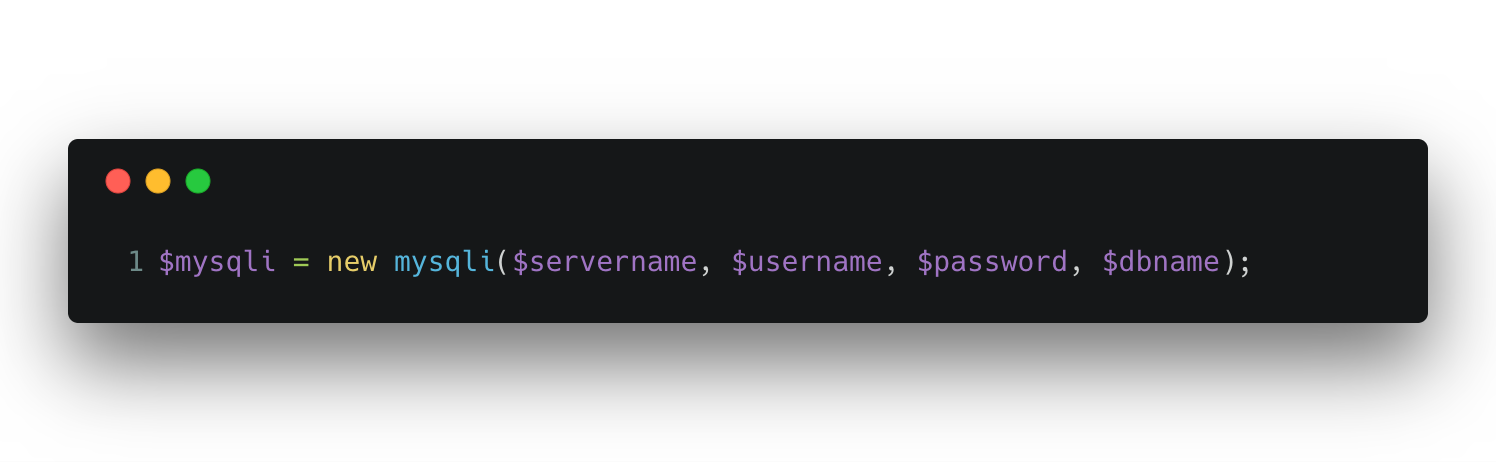 After this simple amount of code, the database should now be connected. It’s always a good idea to check that the database is connected each time though, and if it’s not then the program will throw an error. In my code, I have written an if statement inside the connection file, though it can be put on each page so each time it loads the page will check the connection. As you can see from the ‘die()’ function, the program will end if the database can’t connect and it will write a note of the error for the user. Check out the code below.
index.php
The next page that needs to be created is the index page. This is the first page any user will see so it needs to be aesthetic and make people want to use it. As for the images, introduction and anything else on this page, it doesn’t matter as long as you have a login and signup form somewhere. For this stage of the project, I only added these two forms as it would’ve wasted too much time to make it look pretty if customers weren’t going to use it.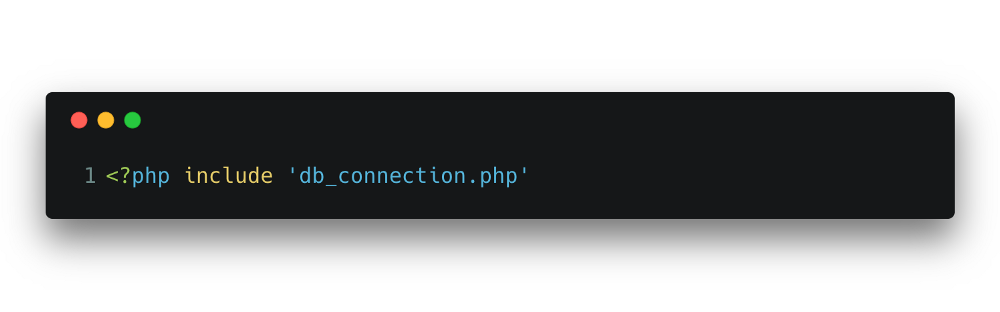 The code above should be used on every page that you need to connect to the database. If you’ve never seen the include function before, it’s very simple and just means “insert all code on the named file into this document right here.” Doing this eliminates the need for extra code on each page. Now every time I visit this page, I will automatically connect to my database. There are a couple more good reasons for doing this. Firstly if or when I decide to launch this on the internet, I won’t have to go through loads of files and change the login credentials. I will only need to change it once on the db_connection.php file. Secondly it keeps all my information a lot more private. Every web designer or developer has at one point or another looked at the source code of a web page. If I included my connection code on this page all someone would have to do is look at the source code to know how to access my database.
 Now I’m connected to the database I can open my HTML tags and start shaping the page. The HTML tags are as simple as I can make them: html, head, charset, title and body tags to begin with. As you can see from the code below, I have started with the signup form.
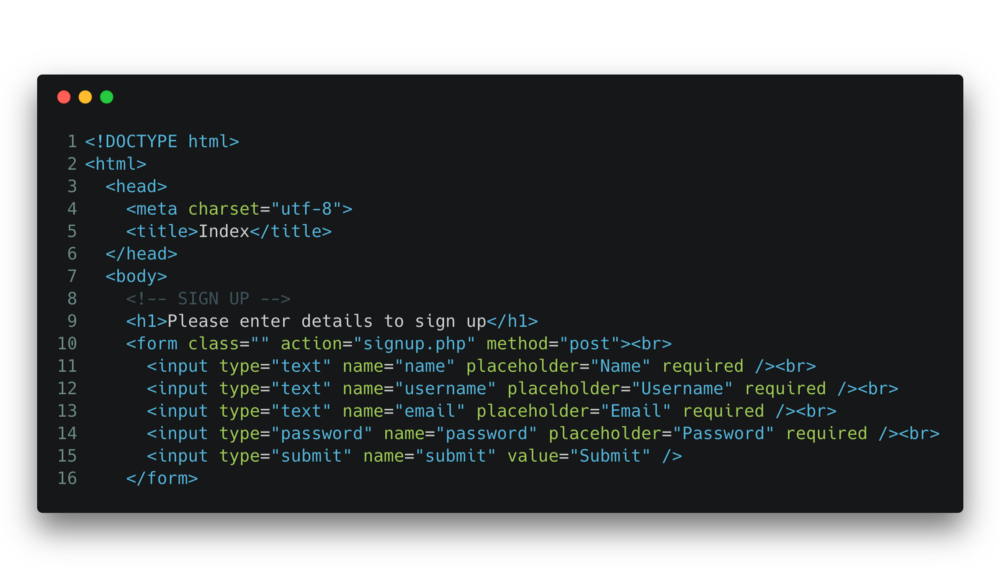 If you don’t know how to write a HTML form but want to use this code you should definitely learn first. If you have even just a little HTML coding experience then this form will be pretty self explanatory. I start by writing the form tags, where I only need to add action and method attributes. The action attribute should contain the file name that you want the data to be submitted to. The method attribute is fairly simple too, I used post since that’s what we’re doing, posting information.
 Next we get to the input tags. Since my form is very simple I only needed four input boxes and one submit tag. If it’s not evident, you need one input tag for each information section on your database table. The type attribute for the name, username and email can be ‘text’ because there is no data to be hidden and all the form is collecting is text. The password tag needs the ‘password’ type as what the user writes needs to be protected. The name attribute is simply giving a name to the tag. This name will be used to reference given to it when we get to the PHP. The placeholder text is not imperative. Placeholder text is what is written in the box before the user writes in it. As soon as the box is clicked this text will disappear and allow the user to write what they want. It is simply used to make forms easier to understand and use. Finally there’s the submit button. This can be done in a variety of ways but since I am making this project as simple as possible I will just use another input tag. Both the type and name attributes will be ‘submit’ because HTML already provides styling for submit buttons. For the writing inside the button you need to use a ‘value’ tag because the writing obviously needs to stay there when the button is clicked.
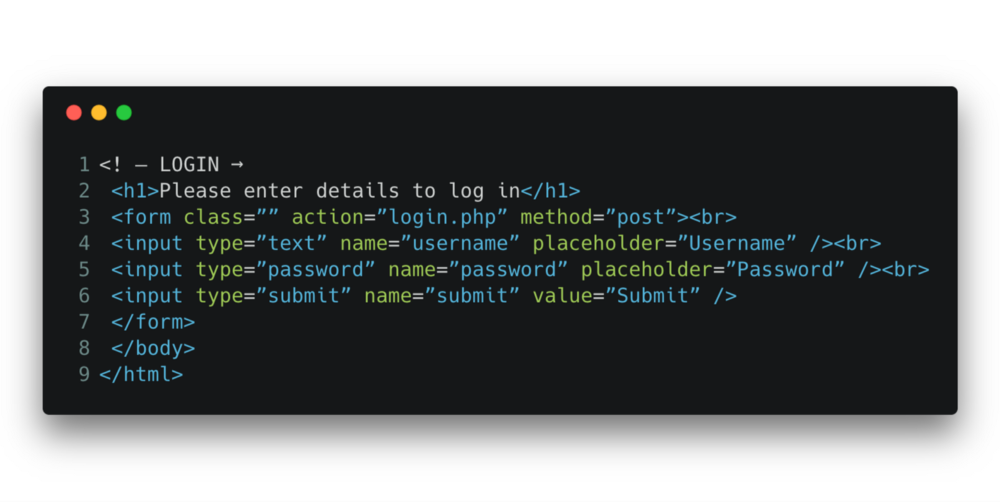 The code for the login form is very similar to the sign up as you can see in the code above. This time the action will post the data to login.php so it can be validated. If you prefer to have even less files it wouldn’t be too hard to change the input names and have both the login and sign up forms go to the same file. I have used two because the username and password inputs have the same name attributes. You may have also noticed the value attribute for the username box is different to normal. I did this as a little extra idea after finishing this project. It’s a remember me function so the user can come back to the login and have the form remember the username in a cookie it collected when the user first signed up. This is the code for setting the cookie.
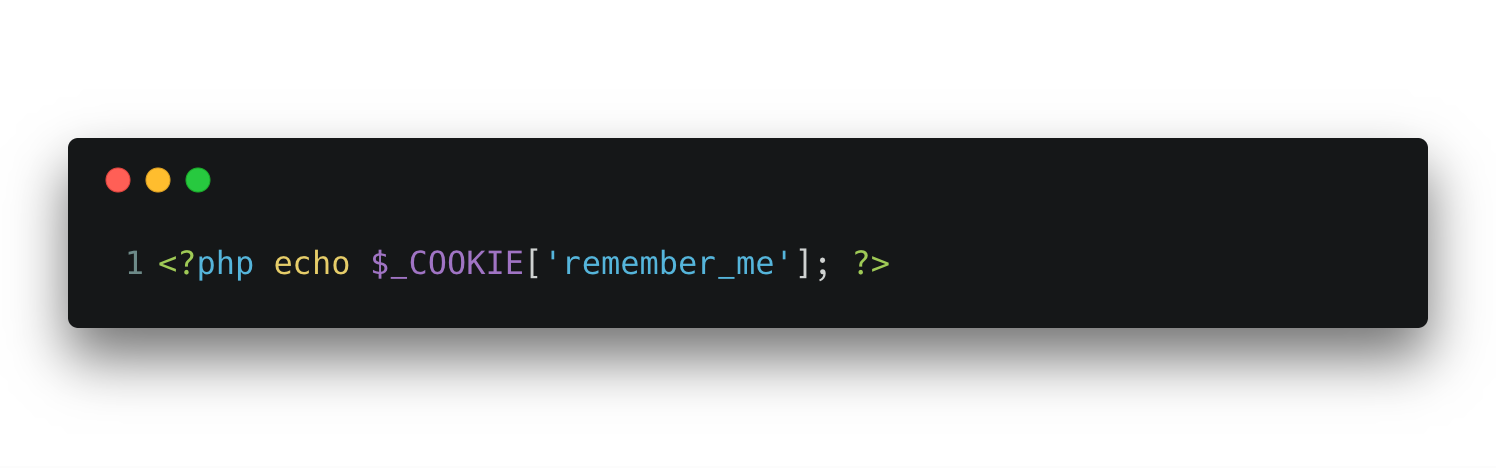
Login and Sign Up Form
signup.php
These two files are where I did most of the PHP coding. When you look at it now it’s actually quite simple code but when I was first writing it there are a few things I just could not get my head around. Firstly i’m going to walk through the signup page. As I’ve Mentioned before we always need to start by connecting to the database.
 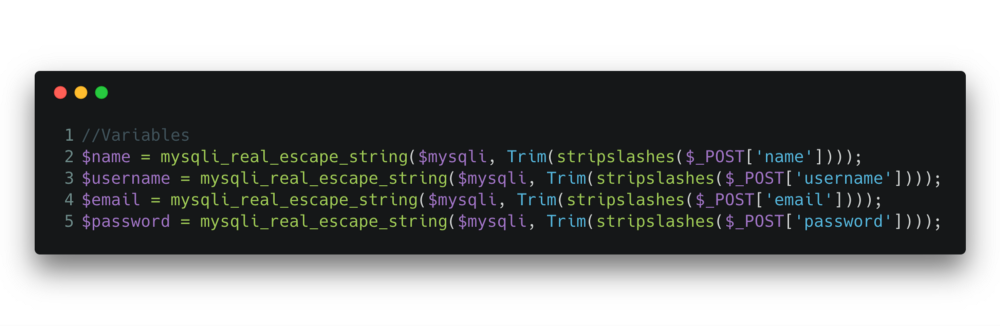 Now come the variables. Since we used the POST function in the HTML we can get the values from the form using the $_POST global variable. You will want to make the variable names either identical or very similar to the html names. The trim() and stripslashes() functions that i’ve used here are not essential. The trim function allows me to take off certain aspects of a string and the stripslashes gets rid of extra characters added by the code. The mysqli_real_escape_string() is a function used to eliminate the possibility for hackers to inject SQL into our database. What this function does is look for special characters that someone wouldn’t likely use in normal sentences and then it escapes them.
 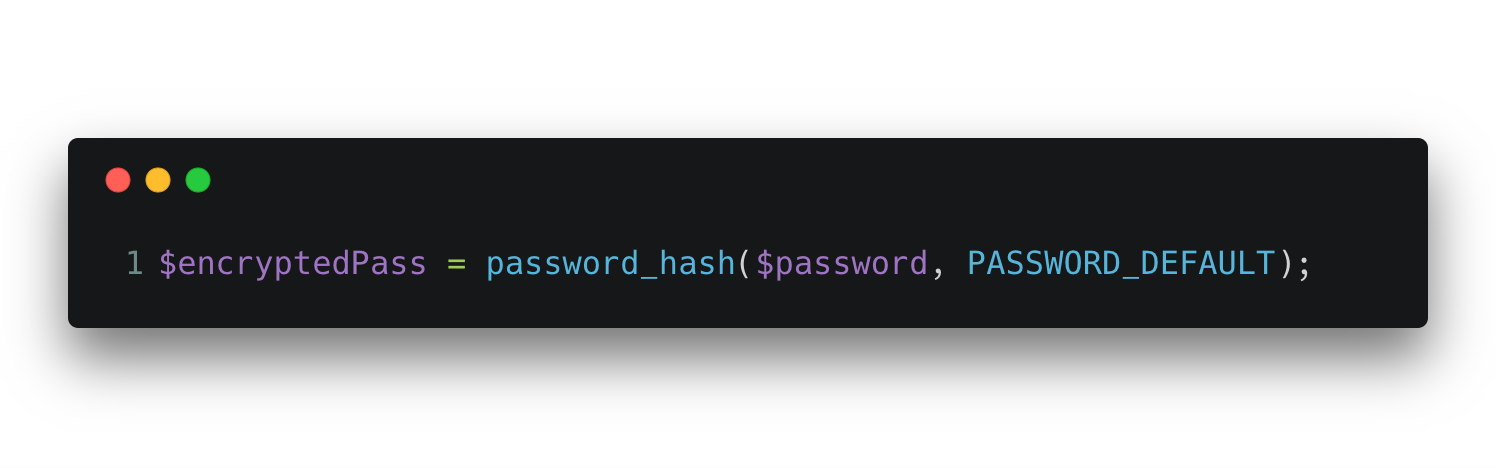 Now we’ve collected our variables we cant move on to manipulating them. I am going to start with the password. Since the user gives the password their password in plaintext we need to make sure it’s protected. Currently what I believe the best way to encrypt a password is the password_hash() function. This function uses a one-way hashing algorithm. This means that the password will be encrypted into a string of 60 characters, numbers and symbols. The only way to check this hashed password is through the password_verify() function, therefore not leaving the password susceptible to decryption hacking.
  The next step is to check to make sure that the username hasn’t been used on an account before. If it has then you can’t let the user use this same username as it has to be a unique identifier. This is probably the simplest line of PHP code in the system, it’s a regular sql query. All it does is searches the username column in the username column and shows any results that are the same as the entered username.
 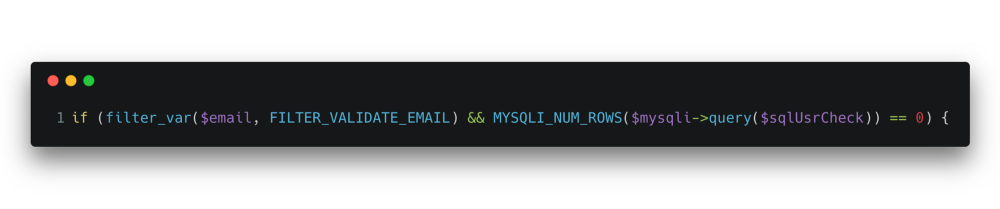 This if statement is main execution part of this program. Up until now we have just been collecting the info and encrypting the password. If we wanted to cut down the amount of code we could merge the two previous pieces of code together and have the SQL statement inside the if statement. I have done it like this to keep it easier to understand and therefore change for others. The first start of this if statement is a function that checks whether the email address that’s been entered is acceptable (This just means it checks for an @ symbol and for something like a .co.uk or .com). The second part of this if statement is what the SQL query is for. The MYSQLI_NUM_ROWS() function counts the number of rows output from the query. Inside the brackets is what query is going to be run and as you can see we’re using the one written just above.
 Essentially this if statement will let the user get to the next part of the code if the email is valid and if there are no listings output from the sql query (the username check).
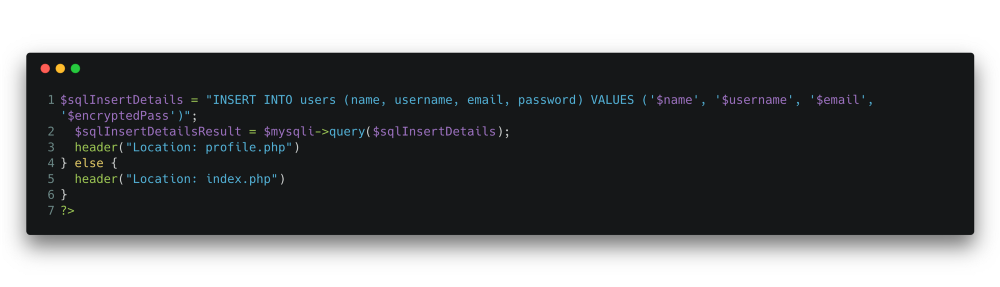 Above is the rest of the code for signup.php. The first four lines are executing an SQL statement that is inserting the data into the users table. As long as everything has gone right then the program will redirect the user to the profile.php page. If something has not gone as expected then the user will be directed back to the index.php page. To make the program better you would add an error message to be printed when directed back to the index page. This would be very easy to do and may be added at a later date.
login.php
The next page is the login PHP page. Instead of checking details and then inserting them into the database, this page will check the login information and if it’s correct the user will go through to the profile page and if it’s not they will stay on the index page.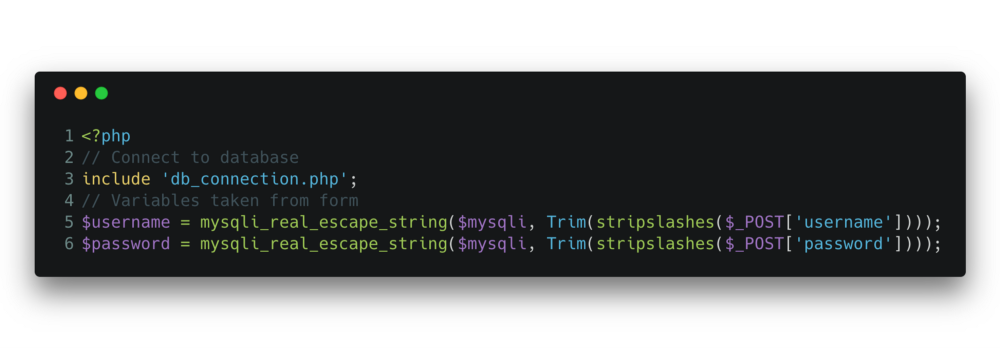 This first few lines are very similar to the signup code. We’re obviously going to connect to the database because we need to check our information against it. Then we’re going to collect our variables again and ensure that all special characters are escaped. You could use the email address instead of the username for this login but I found it easier to do the username. As long as the input is unique to the user then it can be used here.
  The next step is to ask the database to search all its records and show us any results where the username is the same as the username input. The last couple of lines count the number of records and assigns that number to the $count variable. There should only be one record here but that doesn’t matter until the next bit of code.
 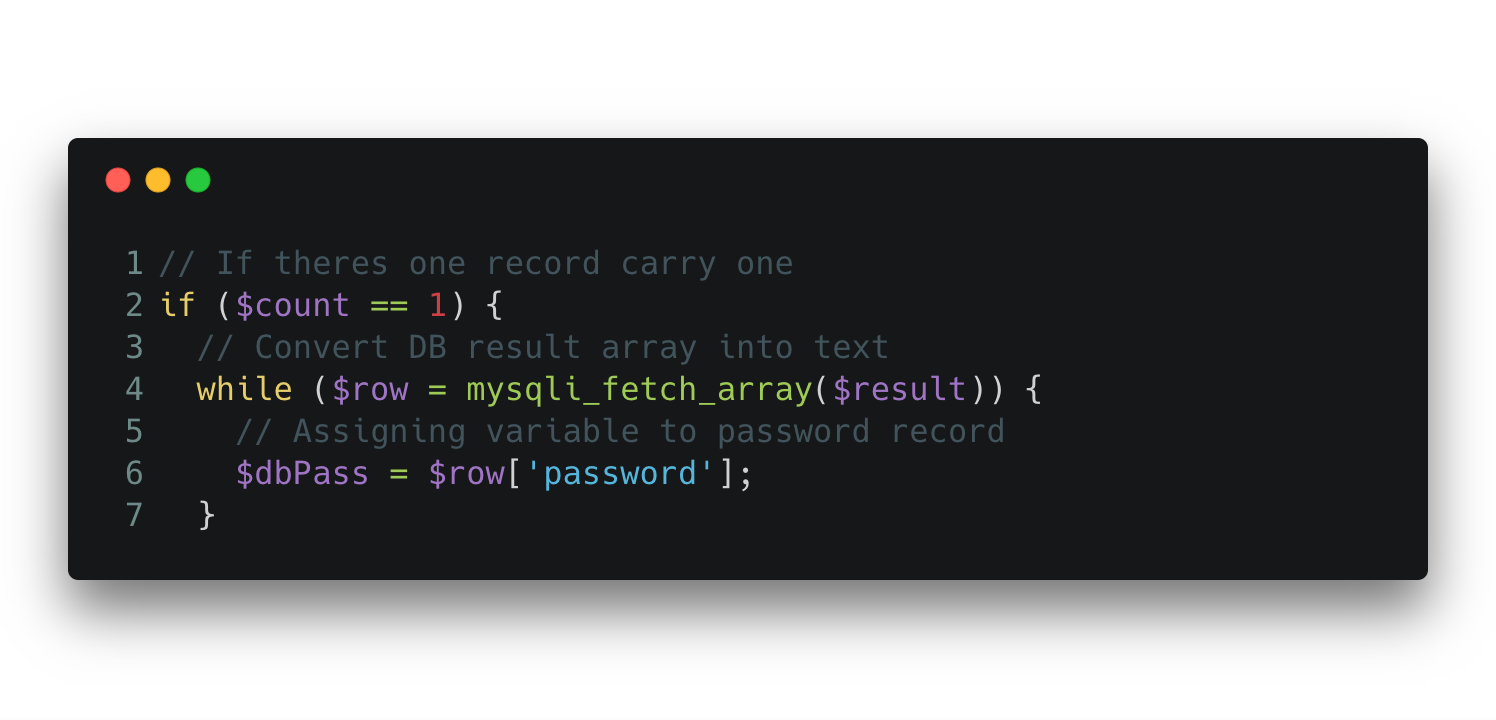 This if statement will execute the code inside of it as long as the value the $count variable holds is 1. This means that there is only one record inside the database with this username.
 The code inside the if statement checks the password. When you collect data from a database it is in the form of an object, we need it to be a string to be able to verify the password. To do this we start with a while loop that will go through each record output from the database (which will only be 1) and it will assign the array to the variable $row. We will then go inside the while loop and change the row we get from the SQL query from the username column to the password column and assign it to the $dbPass variable. Now we have the encrypted password as a string.
 $password = The plaintext password the user has given in the login form. $dbPass = The encrypted password attached to the username given in the login form.
 Now we have the encrypted password as a string we can use the password_verify() function to check it. The only way to check if something matches the password_hash() function. There is no other way of decryption. To use this function we need to give the user given password and the database given password. The function then does its magic and checks them against each other and since this is inside an if statement, the function will let us through if the passwords match. As you can see if they do we will go to the profile.php page and if not we will stay on index.php.
profile.php
The profile.php page is the page you go to after a successful signup or login. The actual code on this page doesn’t matter much for this project. You can simply say “Welcome” or you could initialise some session variables and personalise the welcome page. Right now I only have a welcome message on this page. You can see the code below.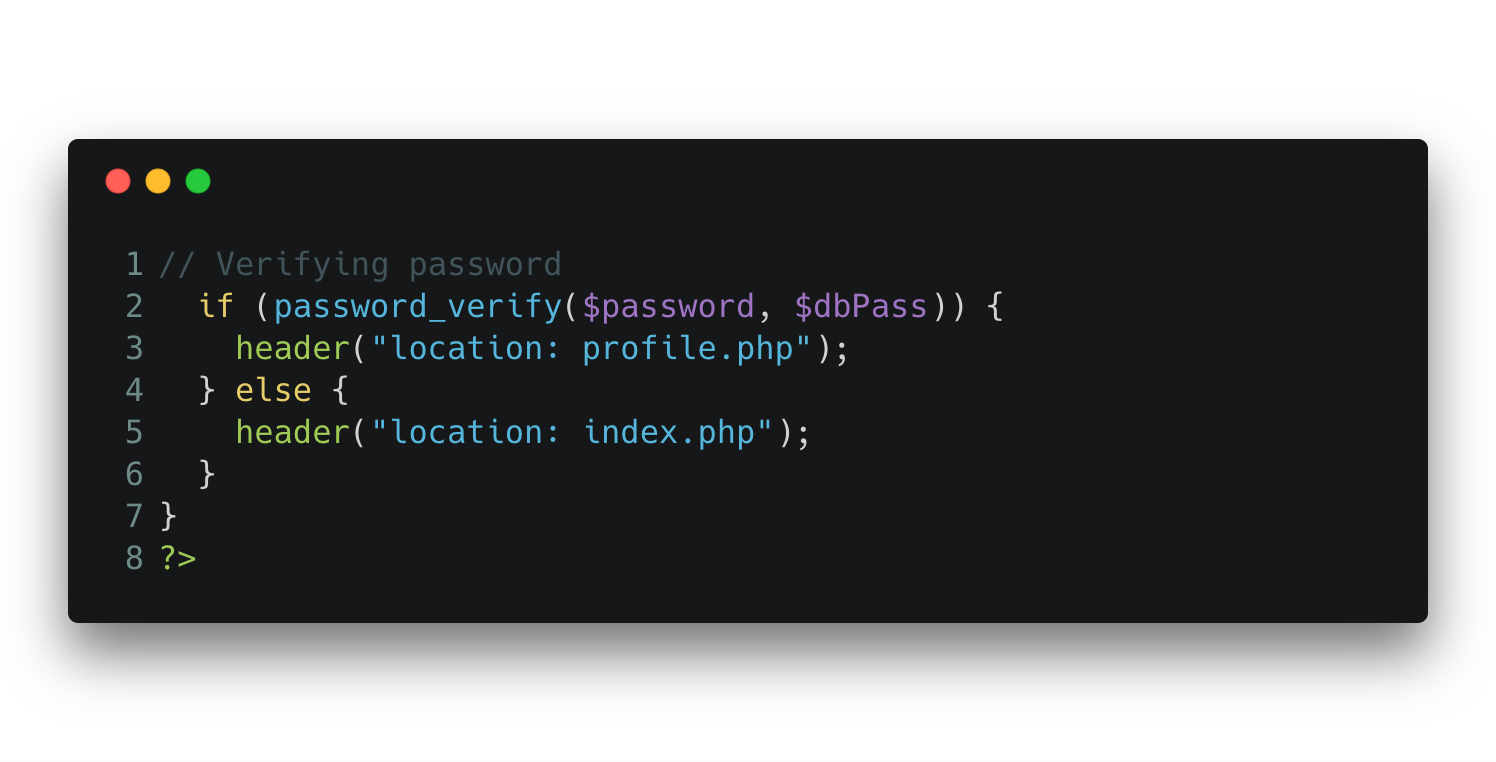
Conclusion
The code I have provided above will give you one of the most basic login forms possible. Unfortunately this means it isn’t the most secure login portal you could make. This code is perfectly good to use for your project but if you are storing a large amount of sensitive customer information you should definitely look to implement some better security measures.Be the first to comment...
0 Comments